


Full Training Tutorial and Guide and Research For a FLUX Style
•
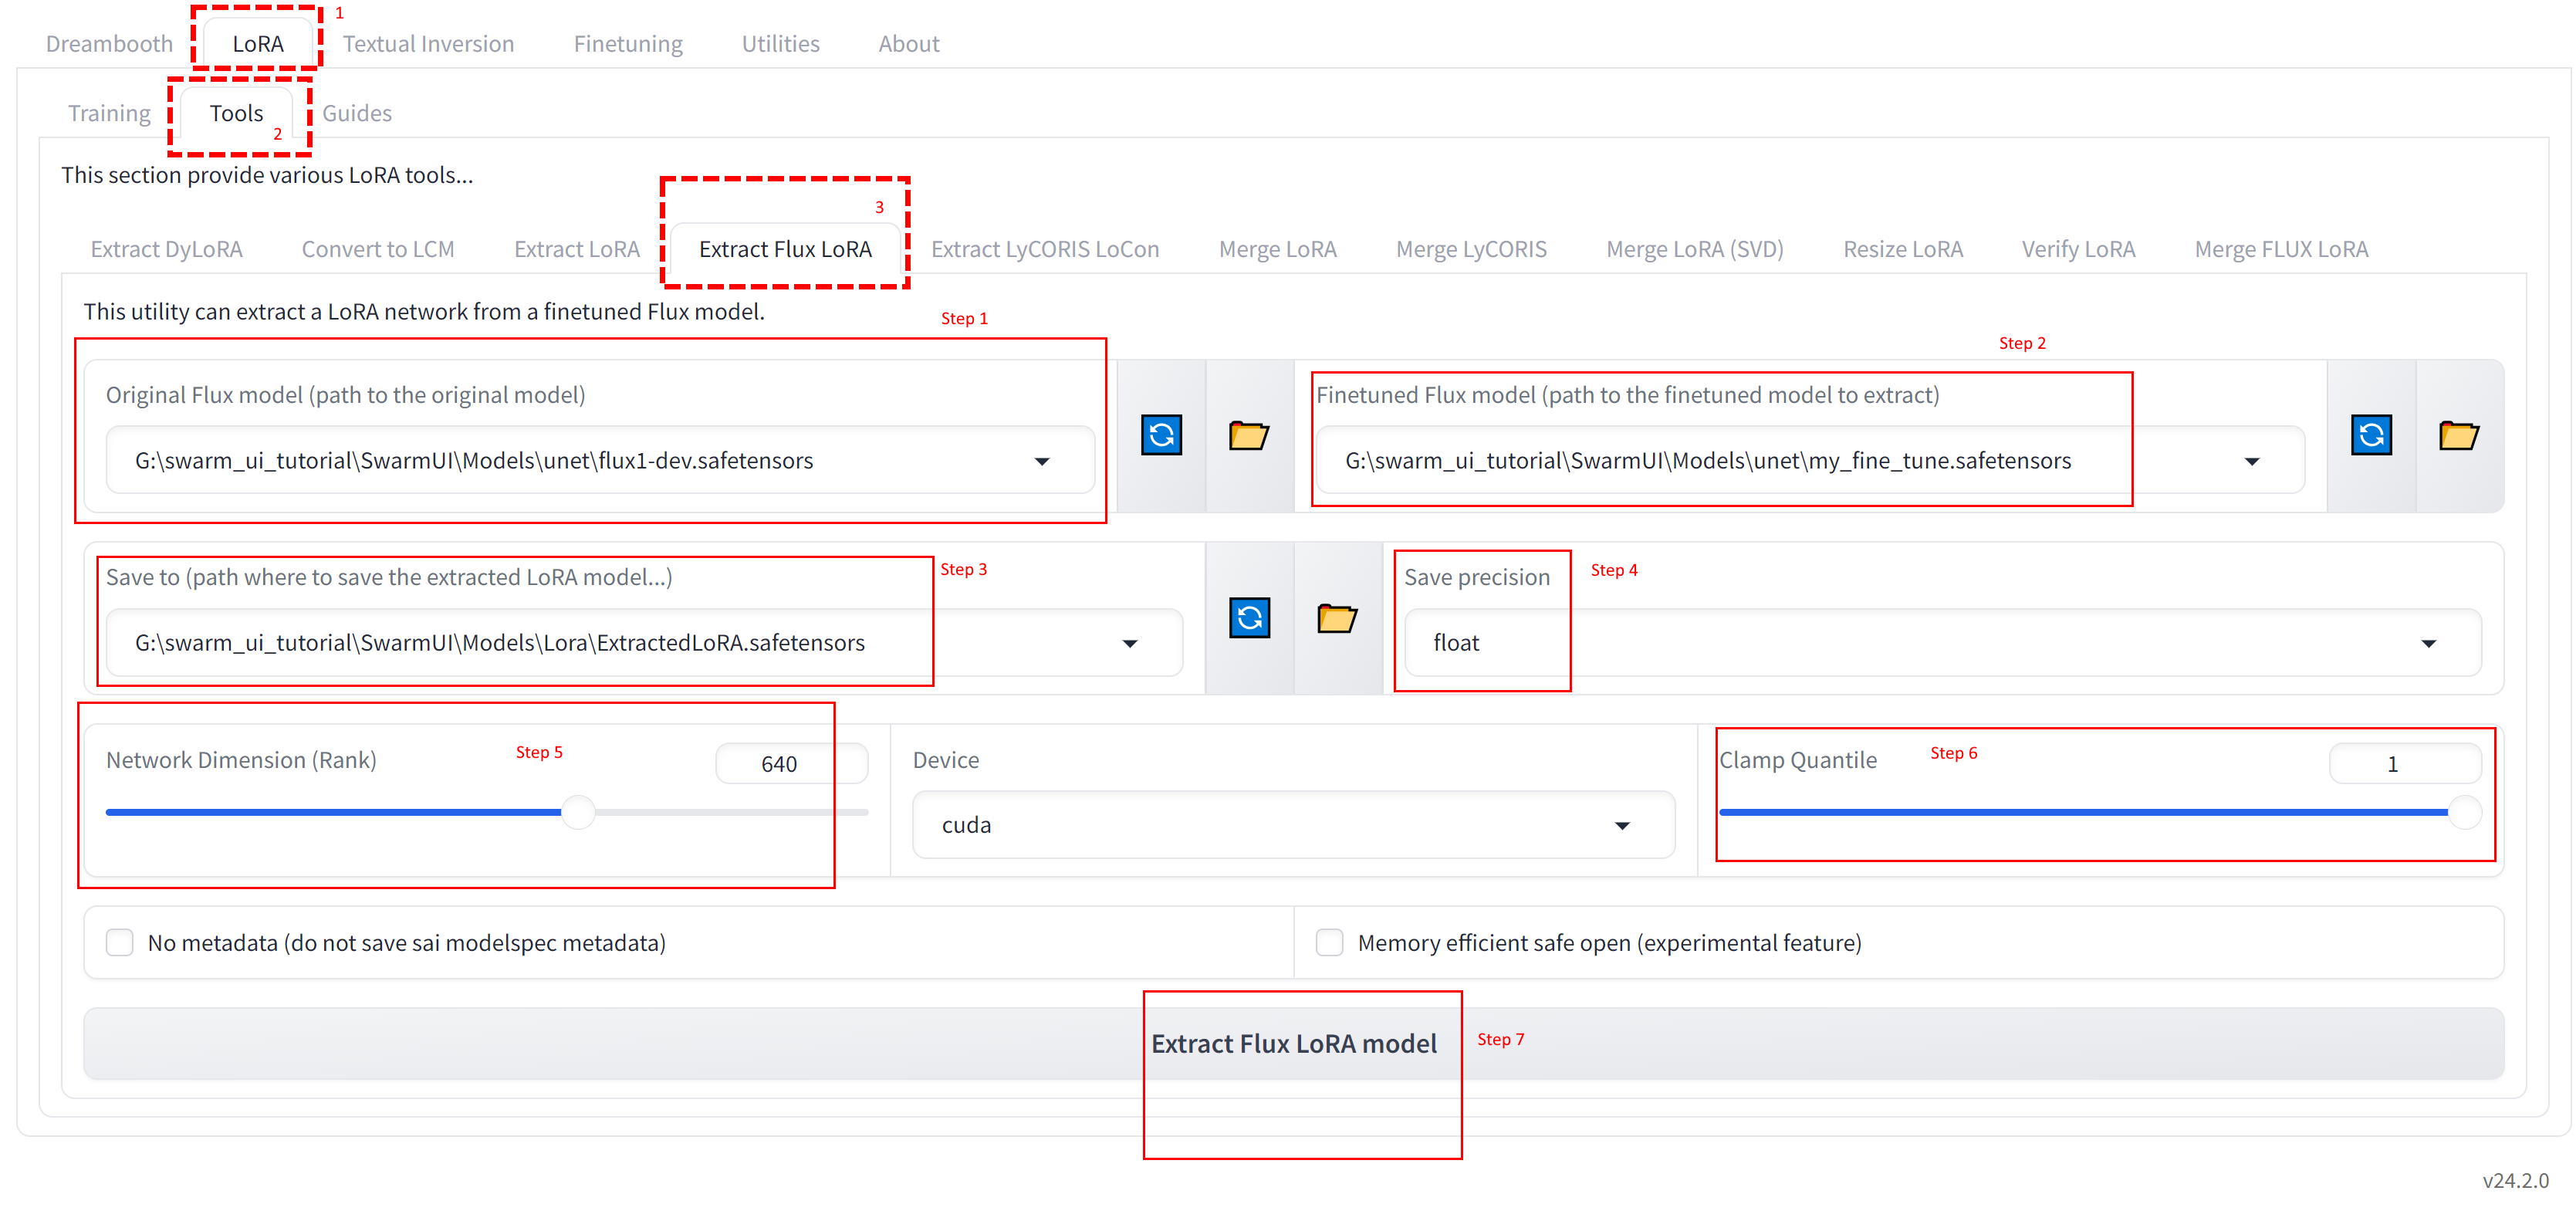
3


much lesser degree but i can't say fully fixes yet :/

there is this space but looks like giving error : https://huggingface.co./spaces/yuhj95/resshift
thanks for comment


Amazing I was planning to make gradio for this
nice thanks+
awesome added to my scripts make list
why this is not single file i was gonna test in swarmUI :/
nice but still reduced quality :/ i should compare with dev 20 steps
It's true: happened also to a video I created from a photo of my wife. But, plus of becoming a little more asiatic, she also grew vampire teeth
totally related to dataset. so their dataset is very likely to unbalanced
haha this is interesting :D


Massed Compute coupon we have is available indefinitely - that is what they told me and still working
Massed Compute coupon we have is available indefinitely - that is what they told me and still working
For this task currently LivePortrait is best


It is open source you can easily install by following github instructions


It works, @MonsterMMORPG !
https://huggingface.co./spaces/Fabrice-TIERCELIN/SUPIR
SUPIR is now available on HuggingFace 🙂 I have disabled LLaVa because there is still an error with it. I will try to fix it in the future. Add links everywhere!
congrats
OK so I have created a template space. Of course it's not working itself because it runs on a CPU but people can duplicate it on a GPU. It should work but I can only test the interface. I say that they need 60 GB VRAM. Correct me if it's wrong. I will wait for feedback.
Our apps works with 29gb ram on kaggle
Can't tell others
@Fabrice-TIERCELIN
we have a working Kaggle notebook
Also we have installers for runpod and massed compute
sadly i can't for this. I also don't know and this requires good GPU

thanks a lot
I did over 100 trainings empirically to find best hyper parameters. And training U-NET + Text Encoder 1 yields better results that only U-NET @researcher171473

100% this is next level. thanks for comment @ajibawa-2023
@ameerazam08 100%. I am talking with original developers for CPU Offloading too if they hopefully add.

